You're about to create your best presentation ever

Set Powerpoint Template

Create your presentation by reusing a template from our community or transition your PowerPoint deck into a visually compelling Prezi presentation.

Template - Poster Set 3

Transcript: Main idea: This provides a brief outline of the investigation. Materials: equipment needed, other resources (books, videos, etc) General Information: This will guide teachers through the process of using the Steps To Inquiry posters. It is the same for all lessons using a particular poster set. Students learn to organize their thinking and design their own inquiry experiments through careful observation of an object, situation, or event. They then conduct their experiments and report their findings in a lab report, poster, tri-fold board, slide, or video that follows the typical format of the scientific community studying the natural world. This prezi outlines the scaffolded approach and a scenario to illustrate its use in the classroom. The subject or topic is used to explain the framework for teachers to guide their students through the inquiry process. It is not designed for any specific grade level, and can be used successfully and appropriately at many levels. Teachers should use their professional judgment to decide what is suitable to the strengths, needs and interests of their students. Step 8: Rationale Student groups then provide an explanation to support their prediction. They can expand on the background discussions and research started in Step 4 by providing more details to support their predictions. As with the prediction statement, the teacher should not judge the content of students‘ rationale. Students need to express their own conceptions and clarify their own thinking before proceeding with their experiments. The teacher actively listens and watches for misconceptions and constructs learning experiences that challenge students to confront these misconceptions. At this point, student groups are almost ready to begin their experiments. Methods The Fishbone Experiment Organizer provides a procedural outline. Teachers should resist the temptation to require students to write out a detailed series of procedural steps at this timeenergy and enthusiasm for the project will wane if written procedures are required at this stage. Safety considerations should again be reinforced before allowing students to proceed. Step 1: Careful observation After the demonstration, students return to their seats to think for a few moments about what they have seen or share observations with a partner or small group. The teacher circulates as students write down their observations, or behavior descriptors, on yellow sticky notes (with one observation per note). This is the first time many of these students have used the Observations Starburst Diagram (Figure 1) so they are reluctant to start. The following scenario describes what happens next: Step 2: Select the dependent variable In scientific research, scientists make careful observations of behaviors and then choose one for further study—the dependent variable (DV). In this activity, the teacher or student selects one of the exhibited behaviors that is of interest to them, which then becomes the dependent variable of the study. This is why the Observations Starburst Diagram is helpful—the act of physically separating one sticky note (i.e., behavior descriptor) and declaring it the dependent variable reinforces the importance of isolating a single behavior. It also demonstrates that selecting a new dependent variable creates a new range and variety of possible studies. A class discussion of how to measure changes in the dependent variable—in terms of instruments, units, and techniques—may be helpful at this point, and ideas will vary depending on students‘ past experiences. This presents another diagnostic opportunity for the teacher to reflect on the vocabulary and phrasing students use for a specific measuring technique or task. The teacher may want to introduce a new device or procedure for students to consider. Since student groups design their own experiments, those interested in learning the new measurement technique can then be explicitly taught those techniques during a subsequent class. The power of this method comes from the fact that the ideas are coming from students. The teacher does not tell them what they have seen—or what they should have seen. It is important that all observations come from the students and are framed in the language they use. This observation period offers an excellent diagnostic opportunity for the teacher to assess students‘ level of scientific understanding through their use or misuse of scientific vocabulary and concepts. It is a time to honor student thinking and listen to their conversations as they debate what they did or did not observe. Through this part of the activity, students are encouraged to develop observation skills without attributing cause or attempting explanation. The sticky notes are particularly helpful for reluctant writers and promote risk-taking because they can easily be added, removed, or relocated to match changes in thinking. Legend: The following symbols appear throughout the prezi. Clicking on an

Template - Poster Set 1

Transcript: This prezi is designed to assist teachers in creating and sharing lessons using the Steps to Inquiry Posters. The "play" button at the bottom of the screen allows teachers to step through the items in sequence. In addition, teachers are able to click on objects at any point in order to zoom in and access the following: •Instructions •Materials •Pictures •Videos •Links •Student examples If additional zooming is required, hover the mouse over the right side of the screen and a zoom tool will appear. The scroll function may also be used for this purpose. The lesson provided here is an example only. It is not meant to be followed step-by-step, but used as a framework for teachers to guide their students through the inquiry process. It is not designed for any specific grade level, and can be used successfully and appropriately at many levels. Teachers should use their professional judgment to decide what is suitable according to the strengths, needs and interests of their students. The learning log is an optional tool for primary students to record their thinking and their results as they work though the investigation. Relevant vocabulary can be added to the “My Science Words” page as they are encountered. Question Matrix Template http://alturl.com/yy7cp STEPS TO INQUIRY Poster Set 1 Cultivating Keen Observers pdf http://alturl.com/9ge47 Teachers begin by showing an object or demonstrating an event. Students are asked to carefully observe the object or event using their senses. Hand lenses and microscopes may be used to extend observations. (Note: Using the sense of taste is not good scientific practice in most circumstances. It may only be done when appropriate and under teacher supervision.) Students record their observations on sticky notes (one observation per sticky). Observations may be in the form of words or pictures. Students may also draw a labeled diagram. Teachers can help deepen observations through prompting questions. One sticky note from step 2a moves to the Measure/Observe spot in Step 3a. One sticky note from Step 2b moves to the Changed Variable spot. All other sticky notes from Step 2b move to the Unchanged Variables spots in Step 3b. Discussion may take place to clarify the concepts of variables and fair testing. Students sort observations according to those that are descriptions and those that relate to the behaviour of the object. Students are then instructed to re-create the object and event so that it behaves in the same way as the teacher’s model. Discussion will occur around the differences in the behaviour of the student examples- why this is happening, are the differences significant, etc. From there, additional observations and questions may be added to the poster. A possible prompting question starter may be “What will happen if…” It is important to note that this process is not linear-– students and teachers may go back and forth between testing , making observations and asking questions. Finally, questions are sorted into categories: those that can be answered through research, those that are testable, and those that are speculative-– difficult to answer but worth thinking about. Sticky notes developed from the "Wonder" section of Step 1 (and determined as testable in the question sort) are moved to Step 2b. (These may also need to be re-worded) Main idea: This provides a brief outline of the investigation. Materials: equipment needed, other resources (books, videos, etc) General Information: This will guide teachers through the process of using the Steps To Inquiry posters. It is the same for all lessons using a particular poster set. Once observations are shared with the class, students use a different colour of sticky note to record questions they may have. Teachers can help to deepen their level of questions through the use of the Q-Chart. This page allows students to explicitly state their question and form a hypothesis. The organizer helps students to learn the importance of keeping the prediction statement separate from their reason. Specific Information: This provides information on the specific activity that is being outlined, including student samples. Links: videos, pdfs, websites Safety Notes The observed behaviours from Step 1 become possible things that could be measured or observed in Step 2a. Sticky notes are moved from the "Observe" section of Step 1 and may need to be re-worded in terms of measurability for Step 2a.

A New Corporate PowerPoint Template

Transcript: Photos Reusable assets A New Corporate PowerPoint Template Ante molestie mattis arcu gravida viverra adipiscing volutpat. Ultrices eget viverra eu lectus ullamcorper. Consequat dictum tristique lectus augue felis nascetur amet non. Velit sit placerat tincidunt integer amet massa justo risus netus. Ornare sagittis malesuada varius cursus ipsum erat libero metus eget. Colors Assets Developing Brand-Aligned Slide Designs 04 01 02 03 Title Aa Aa Subtitle S M W T T S F Paragraph Aa Aa Embedding Techniques Consistency Across Slides Importance of Branding Ensure the logo appears on every slide in the same manner to reinforce brand identity. Consistency in color, size, and position not only enhances professionalism but also aids audience recall. Use embedding techniques that ensure the logo remains intact across different devices and formats. Save the logo in high-quality formats such as PNG for transparent backgrounds, or SVG for scalability without loss of quality. Branding plays a crucial role in how an organization is perceived. Consistent use of visual elements, like the company logo and theme colors, fosters recognition and trust among clients and stakeholders. Slide Design Options Purpose of the Template Title Slide Design Logo Placement Guidelines Overview of Design Elements Visual Impact of the Logo This section covers essential elements for creating engaging slide designs that adhere to corporate branding. Each component plays a pivotal role in maintaining visual consistency and enhancing audience engagement. The primary purpose of the PowerPoint template is to standardize presentations across the company. By establishing a uniform design, each presentation contributes to a cohesive company image that aligns with our core values and mission. Position the logo in the top left corner of each slide for immediate visibility. Maintain sufficient padding around it to avoid visual clutter, ensuring it stands out while complementing the overall design. The title slide sets the tone for the presentation. Incorporate the corporate logo prominently for brand recognition, and use bold, legible fonts. Essential elements include the presentation title, subtitle, and date, ensuring clarity and professionalism without cluttering the slide. The logo acts as a visual anchor in presentations, enhancing brand awareness. A well-placed logo increases viewer trust and recognition, contributing to an effective communication strategy. The template integrates essential design elements such as a clear color palette, consistent typography, and appropriate use of imagery. Each element works in harmony to enhance readability and visual appeal, reinforcing brand identity. Examples of Best Practices Implementation and Feedback Utilizing Theme Colors Best practices include utilizing consistent fonts, aligning images and text uniformly, and adhering to brand colors. These practices not only enhance visual quality but also reinforce brand identity in presentations. Goals for Future Work Implementing a new corporate PowerPoint template requires strategic planning and open communication. Gathering team feedback is crucial for continuous improvement and ensuring that the template meets the needs of all users. Content Slide Variations Theme colors should reflect the brand’s identity. Use the primary colors such as red, blue, orange, green, and yellow consistently throughout the slides, ensuring that critical information stands out, especially in titles and headings. The aim is to continuously refine the PowerPoint template to meet evolving corporate needs. By incorporating feedback and including innovative design practices, the template will remain relevant and effective for all future presentations. Content slides should vary in layout to maintain audience interest. Utilize templates that allow for bullet points, graphics, or video inserts. Consistency in font, color, and logo placement across all content slides enhances the overall cohesive look. Rollout Strategy Continuous Improvement Collecting Team Feedback Image and Text Alignment The rollout strategy involves a phased implementation where team leads receive training first. This ensures that they can assist their teams effectively, maximizing the template's potential across the organization. Logo Integration Introduction to the Template Establishing feedback channels through surveys and meetings allows team members to share their experiences using the template. This direct input can guide future iterations and adjustments to enhance usability. Continuous improvement is key; analyze collected feedback and implement necessary changes to the template. Regular updates help maintain relevance and ensure the template evolves with the organization’s needs. Correct alignment between images and text is vital for readability and aesthetic appeal. Images should complement the text and not overwhelm it; maintaining balance helps convey the message effectively without distractions. This section

Template - Poster Set 2

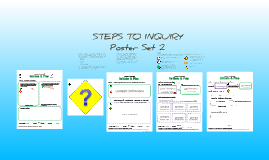
Transcript: This prezi is designed to assist teachers in creating and sharing lessons using the Steps to Inquiry Posters. The "play" button at the bottom of the screen allows teachers to step through the items in sequence. In addition, teachers are able to click on objects at any point in order to zoom in and access the following: • Instructions • Materials • Pictures • Videos • Links • Student examples If additional zooming is required, hover the mouse over the right side of the screen and a zoom tool will appear. The scroll function may also be used for this purpose. The lesson provided here is an example only. It is not meant to be followed step-by-step, but used as a framework for teachers to guide their students through the inquiry process. It is not designed for any specific grade level, and can be used successfully and appropriately at many levels. Teachers should use their professional judgment to decide what is suitable according to the strengths, needs and interests of their students. One sticky note from step 2a moves to the dependent variable spot in Step 3a. One sticky note from Step 2b moves to the independent variable spot. All other sticky notes from Step 2b move to control variable spots in Step 3b. Discussion may take place to clarify the concepts of variables and fair testing. STEPS TO INQUIRY Poster Set 2 Specific Information: This provides information on the specific activity that is being outlined, including student samples. Links: videos, pdfs, websites Safety Notes This page allows students to explicitly state their question and form a hypothesis. The organizer helps students to learn the importance of keeping the prediction statement separate from their reason. Main idea: This provides a brief outline of the investigation. Materials: equipment needed, other resources (books, videos, etc) General Information: This will guide teachers through the process of using the Steps To Inquiry posters. It is the same for all lessons using a particular poster set. On this page, students determine what behaviour they are going to test and begin to think of the variables that may affect this behaviour. Sticky notes are moved from page 1 to page 2. The behaviour that will be observed is moved to Step 2, but re-worded in terms of measurability. The testable questions will be re-worded as variables and moved to Step 3. The observed behaviours from Step 1 become possible dependent variables in Step 2a. Sticky notes are moved from the "Observe" section of Step 1 and may need to be re-worded in terms of measurability for Step 2a. Students sort observations according to those that are descriptions and those that relate to the behaviour of the object. Students are then instructed to re-create the object and event so that it behaves in the same way as the teacher’s model. Discussion will occur around the differences in the behaviour of the student examples- why this is happening, are the differences significant, etc. From there, additional observations and questions may be added to the poster. A possible prompting question starter may be “What will happen if…” It is important to note that this process is not linear-– students and teachers may go back and forth between testing , making observations and asking questions. Finally, questions are sorted into categories: those that can be answered through research, those that are testable, and those that are speculative-– difficult to answer but worth thinking about. Double click anywhere & add an idea Legend: The following symbols appear throughout the prezi. Clicking on an object will allow you to zoom in and read the information contained there. Sticky notes developed from the "Wonder" section of Step 1 (and determined as testable in the question sort) are moved to Step 2b. (These may also need to be re-worded) Once observations are shared with the class, students use a different colour of sticky note to record questions they may have. Teachers can help to deepen their level of questions through the use of the Q-Chart. Cultivating Keen Observers pdf http://alturl.com/9ge47 Question Matrix Template http://alturl.com/yy7cp Teachers begin by showing an object or demonstrating an event. Students are asked to carefully observe the object or event using their senses. Hand lenses and microscopes may be used to extend observations. (Note: Using the sense of taste is not good scientific practice in most circumstances. It may only be done when appropriate and under teacher supervision.) Students record their observations on sticky notes (one observation per sticky) and draw a labeled diagram. Teachers can help deepen observations through prompting questions.

Now you can make any subject more engaging and memorable