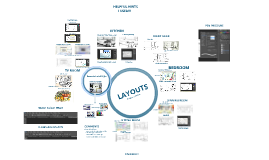
Layouts
Transcript: Arrange your background boxes where you want them to be and position the titles of your boxes. Make sure your boxes are big enough so when you start coding the text boxes, when you start typing your text, that it is big enough to read. 5. The Layout Code (continued) 4. You can delete the text and type what you want according to your box title in which you will be typing under. Remember, do not delete all the text at once or the text box will disappear and you will have to recode that box. 5. On line five, </font></div> is the code that ends your text box (the code on line 2 is what starts your text box). If you want to add more boxes, and you have to code it with the same code used for the previous text box but with different values. 6. The </div> on line 6 means you have finished your layout. You cannot add any more code under that code or it will not appear. Example: Layouts Screenshot of Completed Layout 1. 3. 2. 4. Here is an example after finished customizing. (Remember, you can have more than one text box, as many as long as there is sufficient space.) Go to ribbet.com (ribbet isn't that useful anymore since it went freemium; creating an account won't work), or any other photo-editing websites, upload the image, and start customizing it. Add boxes (Stickers > Basic > Geometric) as the background for your actual text boxes. Rectangle works best. Direct Link Start Coding <div style="background: url('DIRECT LINK OF YOUR IMAGE HERE'); width: XXXpx; height: XXXpx;"> <div style="width: XXXpx; height: XXXpx; overflow: auto; text-align: XXXX; margin-top: XXXpx; margin-left: XXXpx; float: left;"> <font color="black" size="2" face="arial"> text text text text text text text text text text text text text text text text text text text text text text text text text text text text text text text text text text text text text text text text text text text text text text text text text text text text text text text text text text text text text text text text text text text text text text text text text text text text text text text text text text text text text text text text text text text text text text text text text text text text text text text text text text text text text text </font></div> </div> The End - Thank You For Your Attention! Choose a background image. Save it to your computer. Image Once you get your direct link, start coding on the w3schools tab. Here is the code (as you make more and more layouts, the code will start to stick in your mind and you won't have to refer to "how-to" sites anymore): Go to www.w3schools.com and on the homepage there will be a box that says "HTML Example." On the bottom of the box, click the button that says "Try it Yourself." The page where you land is where you start coding your layout. Delete the example code; you won't need that. Alignment Remember to give the proper credits too!!! In order to use your customized image as your background, you need to upload it to sites like TinyPic or Imgur to get a direct link otherwise your image won't show up and your code will be invalid. Start Coding Notes: 1. The width and height values on the first line is where you put how big your image is. You have to use the exact values or your code will not work. You can always refer back to Ribbet or the photo-editing site that you use for the width and the height. 2. The width, height is how big and how wide your text box will be. Keep in mind it has to fit into your background box. Text-align is whether you want your text to be to the left (recommended), right, or center. Margin-top is how far from the top your text box will be. Margin-left: how far from the left. 3. On code line 3, you can customize the font color, size, and font-family to anything you want. The Layout Code Choose a color for your text boxes and font styles (titles of your boxes). The titles can be anything such as About Me or News, etc. 6.


